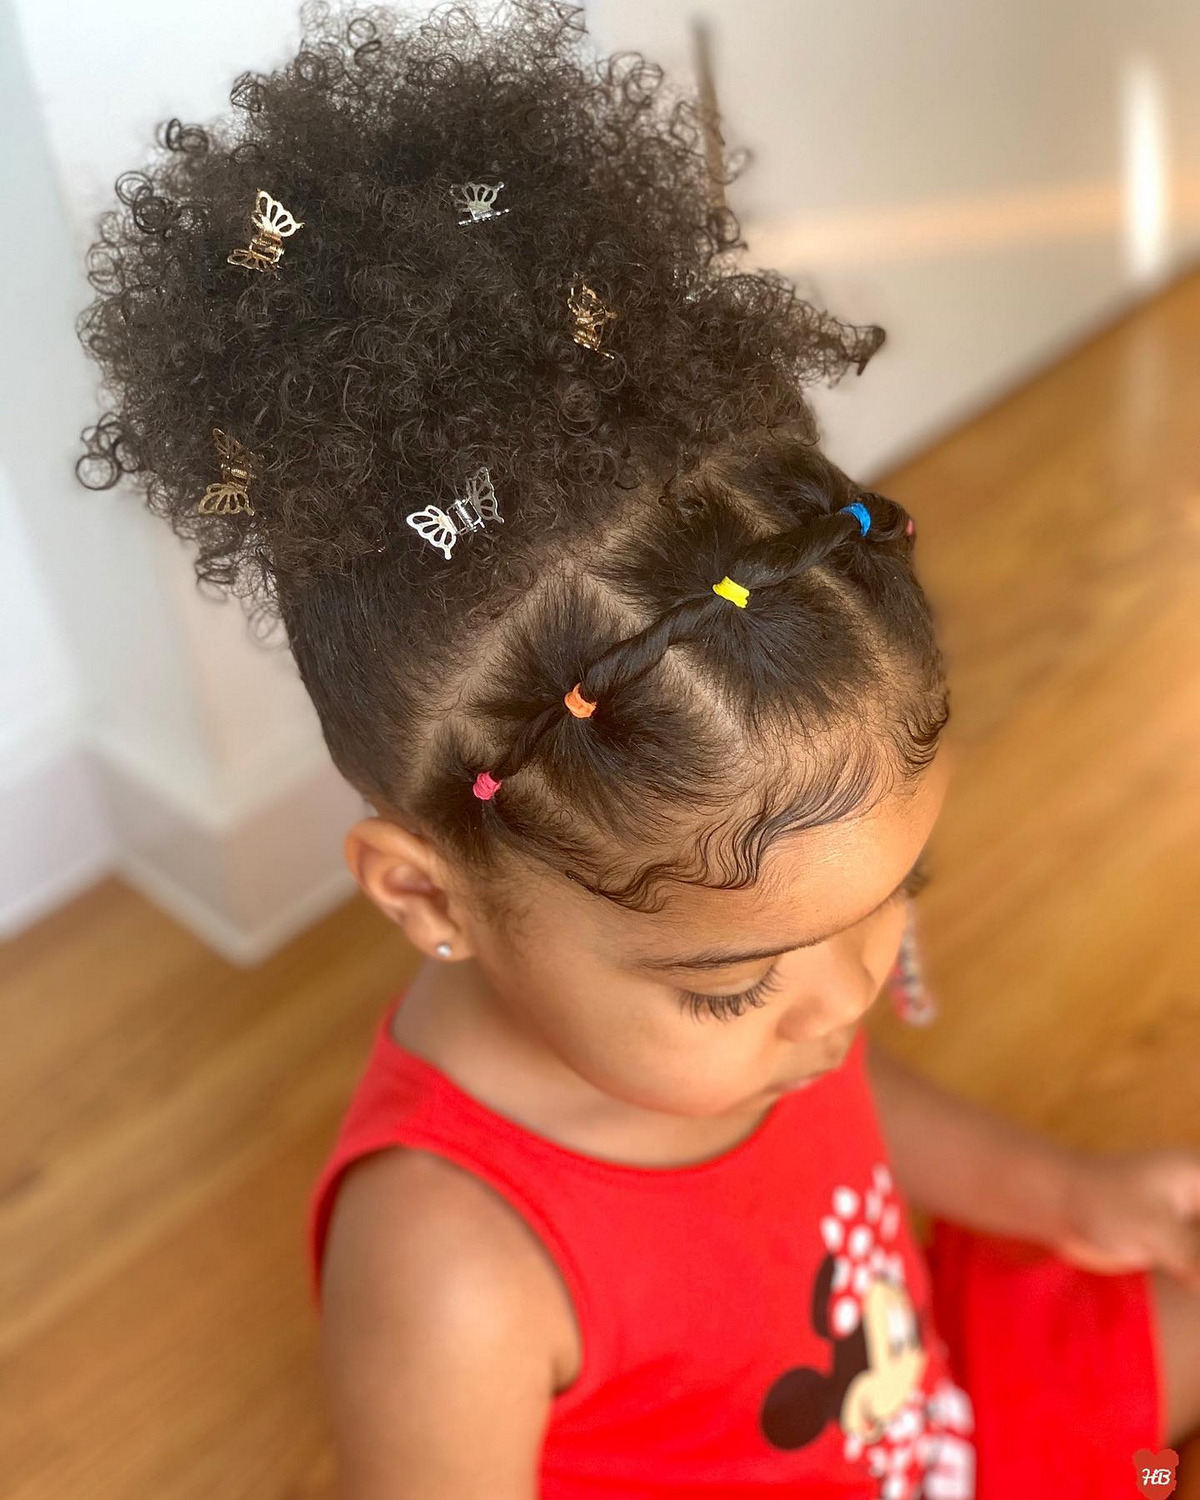
The enchanting world of little girls’ hairstyles is often a canvas for creativity, and at the heart of countless adorable looks lies a simple, yet indispensable tool: the humble rubber band. Far more than just a means to tie hair back, rubber bands offer an unparalleled combination of versatility, security, and decorative potential, making them an absolute staple for parents and caregivers styling young locks. From keeping stray strands out of busy eyes during playtime to crafting elaborate, picture-perfect styles for special occasions, rubber bands empower you to create a myriad of looks that are both practical and charming.
This comprehensive guide will delve into the art of using rubber bands to style little girls’ hair, exploring everything from the essential tools and techniques to a wide array of creative and functional hairstyles. We’ll cover basic ponytails and pigtails, intricate pull-through braids, whimsical heart designs, and much more, ensuring you have a repertoire of ideas to keep your little one looking neat, stylish, and utterly adorable. Beyond the aesthetics, we’ll also touch upon crucial tips for maintaining hair health and making the styling process a joyful bonding experience rather than a battle.
The Essential Toolkit: Choosing and Using Rubber Bands Wisely
Before diving into the myriad of styles, understanding the nuances of rubber bands themselves is paramount. Not all rubber bands are created equal, and selecting the right type can make a significant difference in comfort, hold, and hair health.
Types of Rubber Bands:
- Clear/Transparent Bands: These are fantastic for achieving an "invisible" hold, especially when you want the focus to be on the hair design itself, or when you’re layering bands within a style. They blend seamlessly with any hair color.
- Colored Bands: A favorite among little girls, colored bands add a pop of fun and can be coordinated with outfits or themes. They are perfect for creating playful patterns or adding a vibrant touch to a simple ponytail.
- Fabric-Covered ("Ouchless") Bands: These are arguably the best choice for delicate hair. Wrapped in soft fabric, they reduce friction, minimize breakage, and are much gentler on the scalp during application and removal. While they might not offer the super-tight grip of pure elastic, their hair-friendly nature makes them invaluable.
- Silicone Bands: Often clear or translucent, silicone bands offer a good grip without being overly harsh. They are durable and tend to hold up well against water and humidity.
Size Matters:
Keep a variety of sizes on hand. Tiny bands are ideal for securing small sections, like the beginning of a braid or a mini-ponytail. Medium-sized bands work well for pigtails or half-up styles, while larger, softer bands are perfect for full ponytails or buns.
Tips for Gentle Use:
- Don’t Over-Tighten: While you want the style to hold, pulling the band too tight can cause discomfort, tension headaches, and even hair damage. Aim for secure, but comfortable.
- Section Neatly: Use a fine-tooth comb to create clean, crisp partings. This not only makes the style look polished but also helps distribute tension evenly.
- Damp Hair Advantage: For many styles, especially those requiring neat sections, slightly damp hair (from a spray bottle with water or detangler) is easier to work with than completely dry hair.
- Gentle Removal: Never yank rubber bands out. For pure elastic bands, it’s often safest to snip them carefully with small, blunt-tipped scissors (ensure you’re only cutting the band, not the hair!). For fabric-covered or silicone bands, gently stretch and slide them off. A little detangling spray can help.
- Prep with Products: A good detangling spray is your best friend. For frizz-prone hair, a light leave-in conditioner or styling cream can also help smooth strands before banding.
Basic Hairstyles: The Building Blocks of Creativity
Mastering these fundamental styles will provide a strong foundation for more intricate designs.
-
The Classic Ponytail:
- High Ponytail: Gather all hair at the crown of the head, smooth it, and secure with a band. A timeless look that keeps hair completely out of the face.
- Low Ponytail: Gather hair at the nape of the neck. Ideal for a softer, more relaxed look, or for girls with shorter hair that doesn’t reach a high ponytail.
- Side Ponytail: Sweep hair to one side of the head and secure. Adds a playful, asymmetrical touch.
-
Double Ponytails (Pigtails):
- Part the hair down the middle from front to back. Gather each section into a ponytail on either side of the head, usually behind the ears or higher up. Pigtails are universally adorable and great for balancing hair volume.
-
Bubble Ponytails:
- Start with a regular ponytail (high, low, or side).
- Place another rubber band a few inches down the length of the ponytail.
- Gently pull the hair between the two bands to create a "bubble" effect.
- Continue adding bands and creating bubbles down the entire length of the ponytail. This adds incredible texture and volume to a simple look.
-
Basic Braids (Secured with Bands):
- Single Braid: Gather hair into a ponytail, then braid the length of the ponytail into a simple three-strand braid. Secure the end with another small band.
- Pigtail Braids: Create two pigtails, then braid each one. This is a classic, neat, and long-lasting style perfect for active days.
-
Simple Buns:
- High Bun: Create a high ponytail. Twist the ponytail around its base to form a bun, securing it with another rubber band (or two for extra hold).
- Space Buns: Create two high pigtails. Twist each pigtail into a bun and secure. These are super trendy and fun.
Creative & Advanced Hairstyles with Rubber Bands
Once you’re comfortable with the basics, rubber bands open up a world of more intricate and eye-catching designs.
-
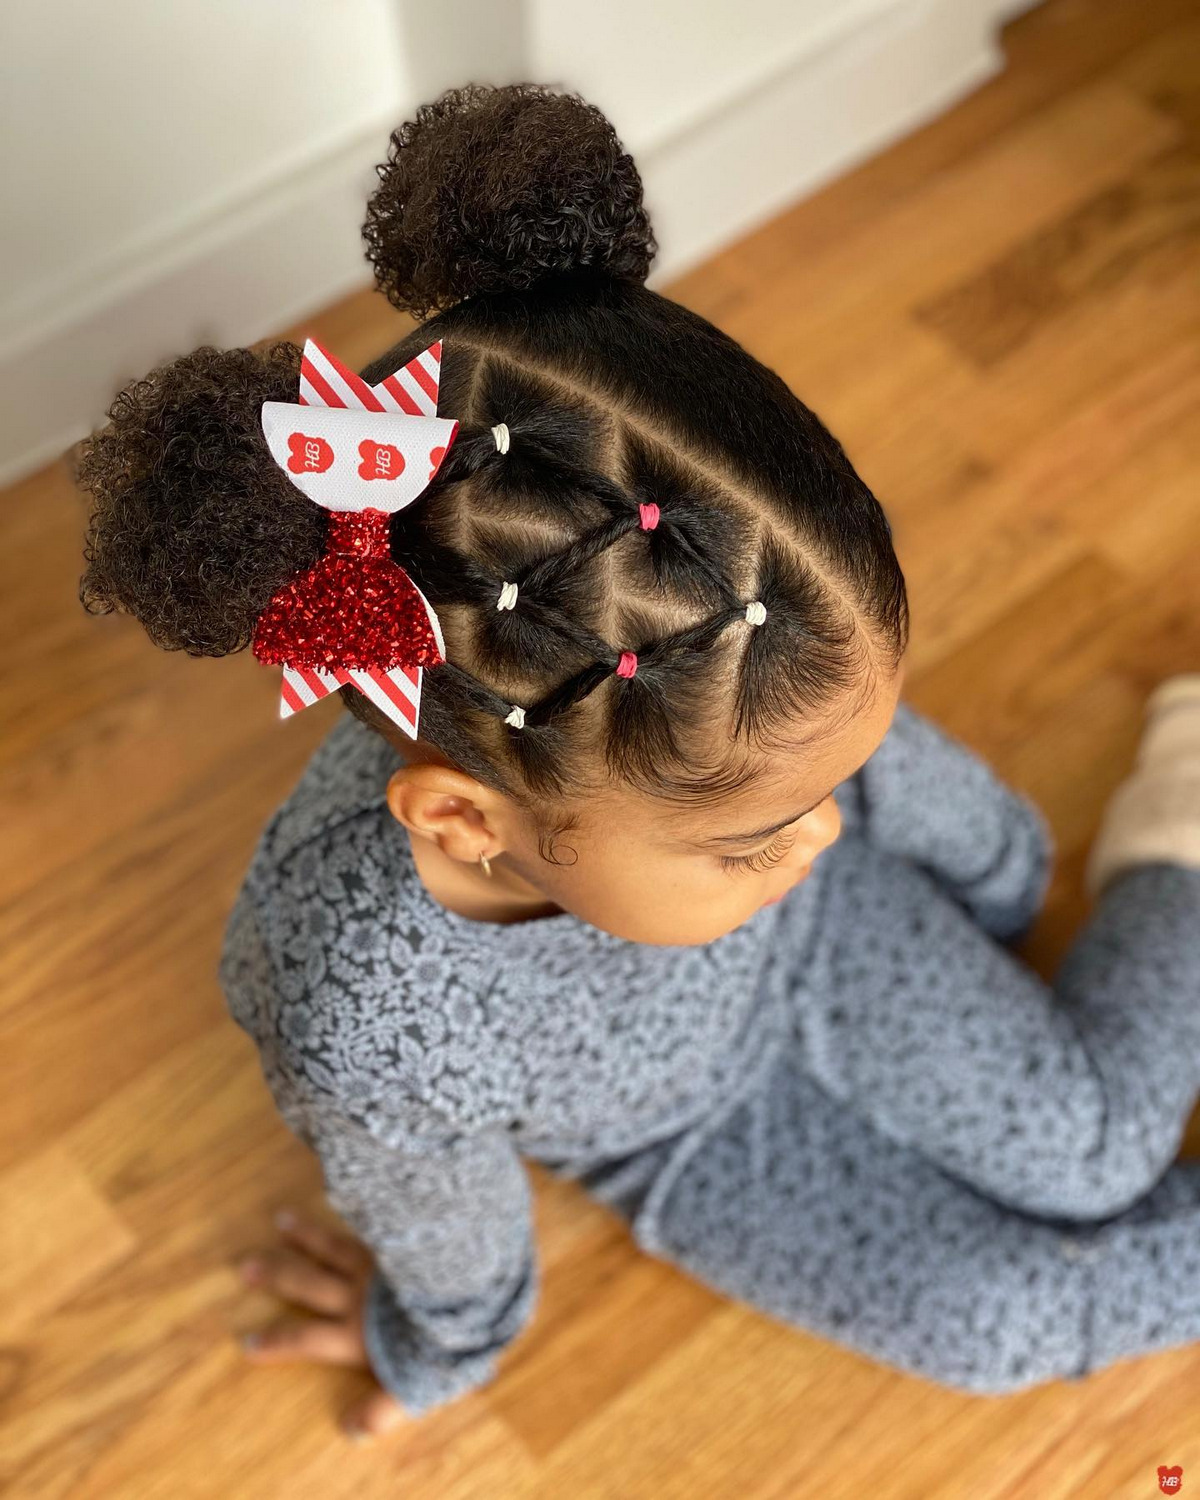
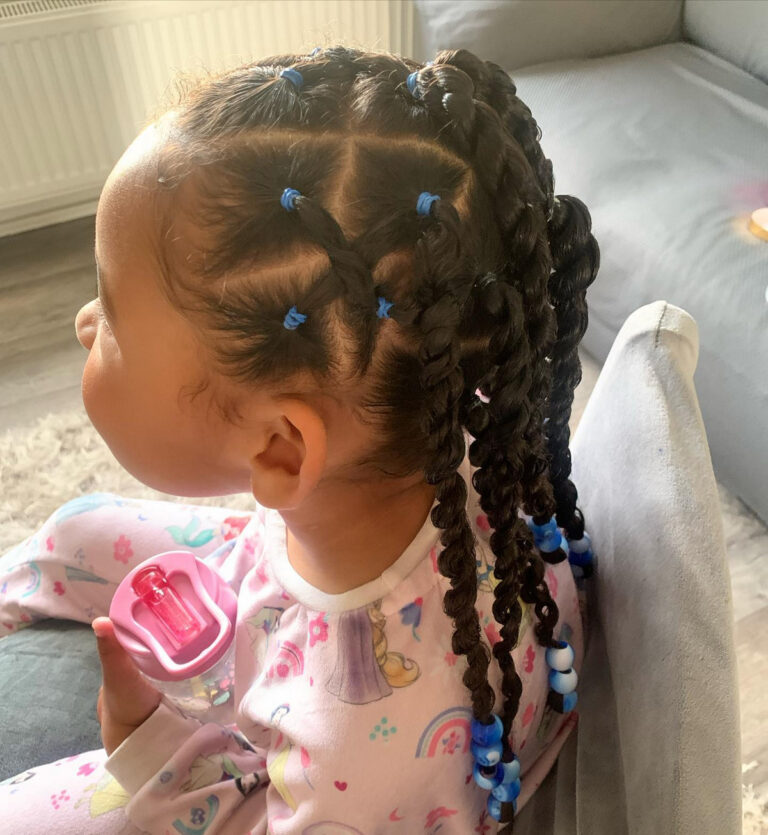
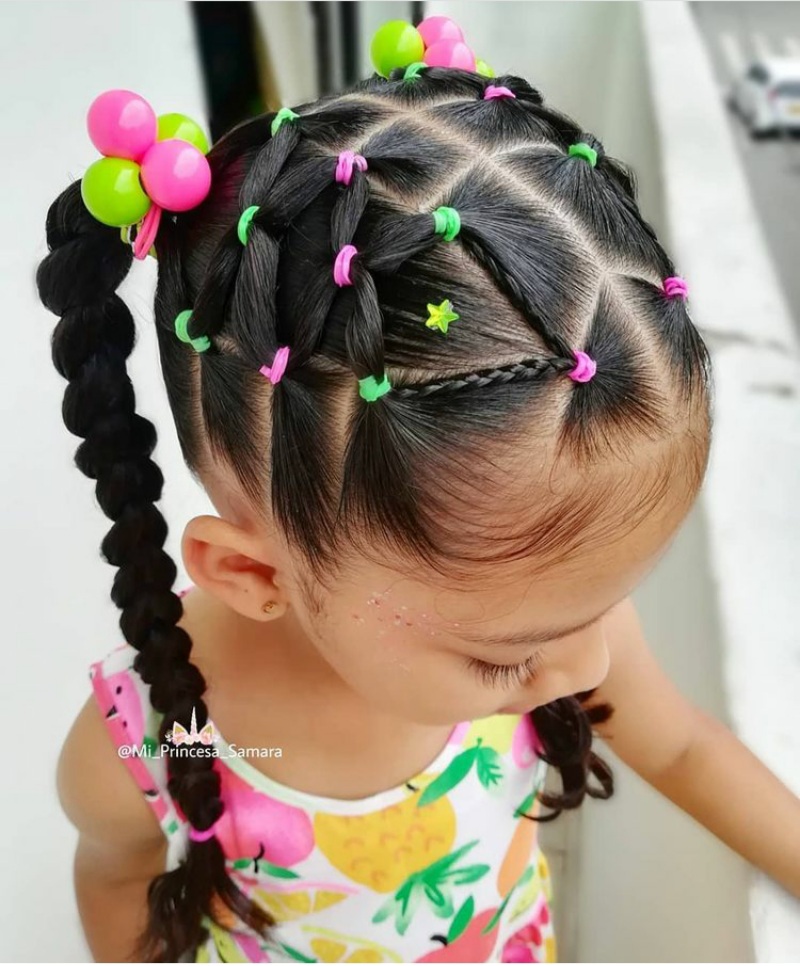
Pull-Through/Ladder Braids:
- This technique creates the illusion of a braid using only ponytails, making it easier for those who struggle with traditional braiding.
- How-To: Take a small section of hair at the crown and secure it with a band (Ponytail 1). Take another section directly below it (Ponytail 2). Split Ponytail 1 in half and bring the two halves around Ponytail 2, joining them with a new band below Ponytail 2. Then, take Ponytail 2 and pull it up and through the split in Ponytail 1. Continue this process, adding new sections of hair for each new ponytail, or simply linking existing ponytails for a "faux braid" down the back. This creates a beautiful, textured "ladder" effect.
-
Rubber Band Mohawk/Faux Hawk:
- Part the hair down the middle from front to back, creating a central strip.
- Take small sections within this strip, one after another, and secure each with a rubber band, creating a series of small ponytails down the center of the head.
- You can leave these as cute puffs, or twist/braid each section for added texture. This is a bold and playful look.
-
Criss-Cross/Basket Weave:
- This style involves taking small sections of hair from the front or sides and crossing them over, securing them with bands.
- How-To: Part hair down the middle. Take a small section from the front right, angle it towards the back left, and secure it with a band. Take a small section from the front left, angle it towards the back right, and secure it, perhaps overlapping the first section. You can continue this pattern, adding more hair with each new band, to create a beautiful woven effect across the crown.
-
Heart Hairstyles:
- A delightful and popular choice for special occasions.
- How-To: Part hair down the middle. Take a small section from the top right side. Split it into two smaller sections. Curve one section downwards and the other upwards, bringing their ends together to form half a heart shape. Secure with a band. Repeat on the left side, then join the two heart halves with another band at the bottom. You can also create two separate hearts side-by-side, or use the heart shape as the starting point for pigtails.
-
Half-Up, Half-Down Styles with Bands:
- Twisted Half-Up: Take a small section of hair from each temple. Twist each section backward, then bring them together at the back of the head and secure with a rubber band.
- Mini Ponytail Crown: Create several small ponytails across the top of the head, connecting them with additional bands or leaving them as individual puffs.
-
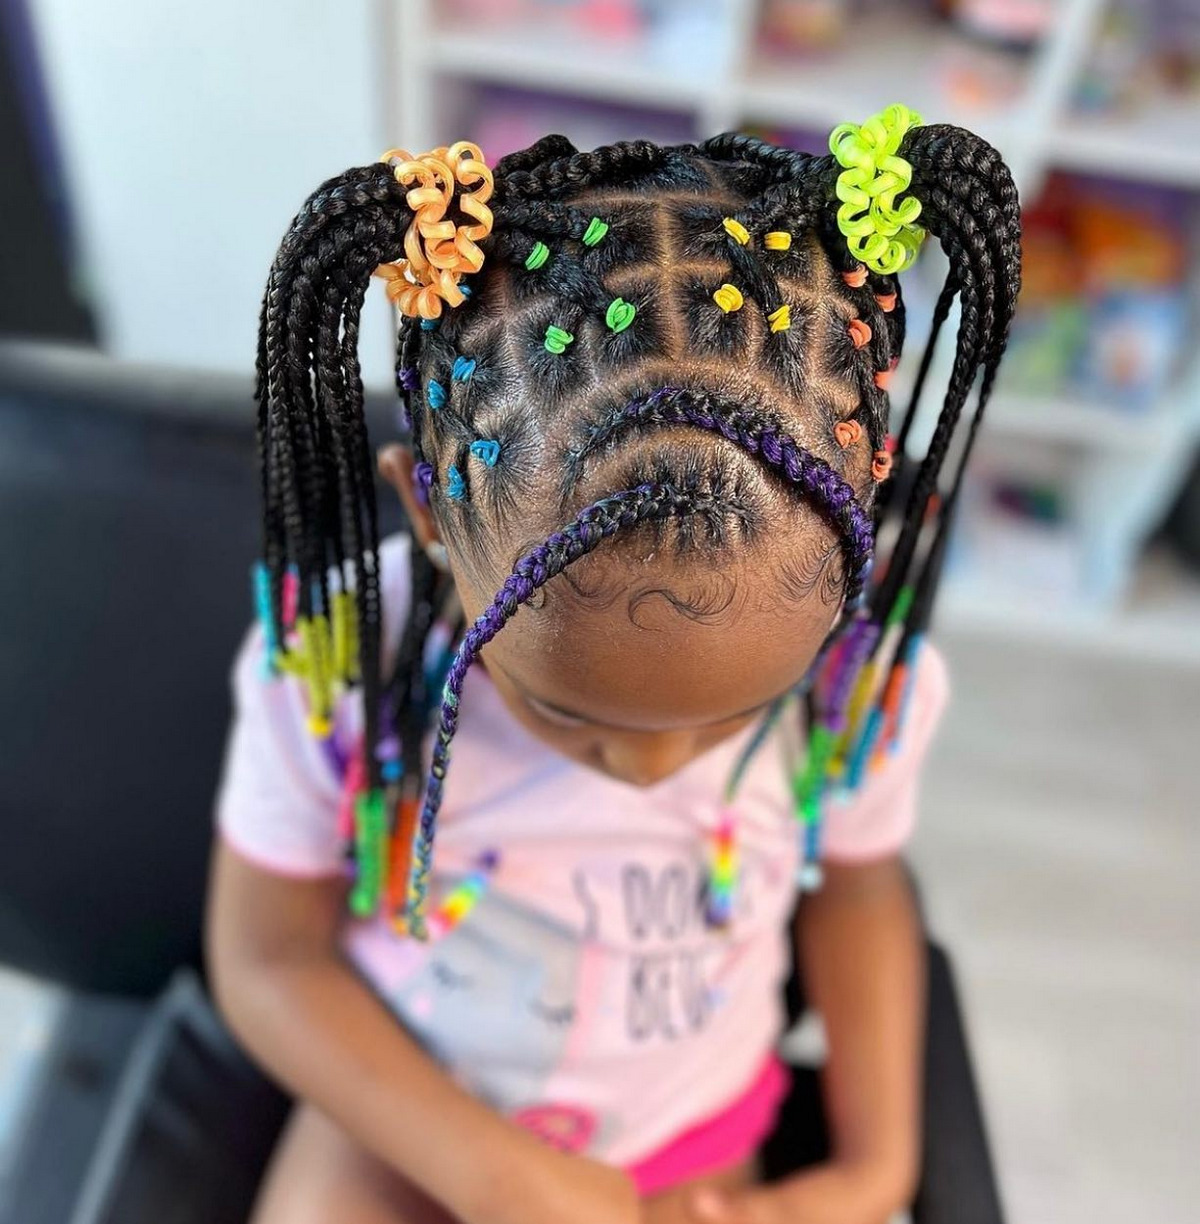
Patterned Parting Styles:
- Elevate any banded style by starting with a creative parting.
- Zig-Zag Parting: Use a comb to create a zig-zag line across the scalp before forming ponytails or braids.
- Curved Parting: Create a gentle curve for a softer look.
- Geometric Partings: Divide the scalp into squares or triangles, securing each section with a band. This is particularly striking for styles with many small ponytails.
-
Adding Accessories:
- Rubber bands provide the perfect base for adding bows, ribbons, clips, or decorative hair ties. Once the style is secure, simply clip or tie on your chosen embellishment for an extra touch of charm.
Tips for Successful Styling and Hair Care
Styling a little girl’s hair should be a fun and positive experience for both of you.
- Patience is a Virtue: Little ones have short attention spans and can be wiggly. Approach styling with patience and a calm demeanor.
- Distraction Techniques: Put on their favorite show, offer a small snack, or give them a toy to play with while you work. Keeping their hands busy can work wonders.
- Prioritize Comfort: Always check that the style isn’t too tight or pulling uncomfortably. If your child complains, adjust it immediately.
- Hair Health is Key:
- Regular Washing & Conditioning: Use gentle, child-friendly shampoos and conditioners.
- Detangle Thoroughly: Always detangle hair before styling. A wide-tooth comb and detangling spray are essential.
- Protective Styles for Sleep: For long hair, a loose braid or bun before bed can prevent tangles and breakage overnight.
- Moisturize: For dry or curly hair, a light leave-in conditioner or hair oil can keep strands healthy and manageable.
- Avoid Over-Styling: Give the hair a break from tight styles and bands occasionally.
- Involve Your Child: Let them pick out the color of the rubber bands or choose between two simple styles. This gives them a sense of control and makes them more cooperative.
- Practice Makes Perfect: Don’t get discouraged if a style doesn’t look perfect the first time. The more you practice, the more skilled you’ll become.
Conclusion
The journey of styling little girls’ hair with rubber bands is a delightful blend of practicality, creativity, and bonding. From the simplest pigtails that keep hair out of the way for a day of play, to elaborate pull-through braids that draw admiring glances, rubber bands are an indispensable tool in any parent’s hair arsenal. They offer endless possibilities for expression, allowing you to tailor looks that are as unique and vibrant as your child’s personality.
Beyond the aesthetics, the moments spent styling hair can become cherished memories, filled with laughter, conversation, and gentle touch. By choosing the right tools, mastering basic techniques, and embracing a spirit of playful experimentation, you can transform daily hair routines into enjoyable rituals. So, gather your colorful bands, unleash your imagination, and enjoy the wonderful world of hairstyles for little girls with rubber bands – creating not just beautiful looks, but also lasting connections.
